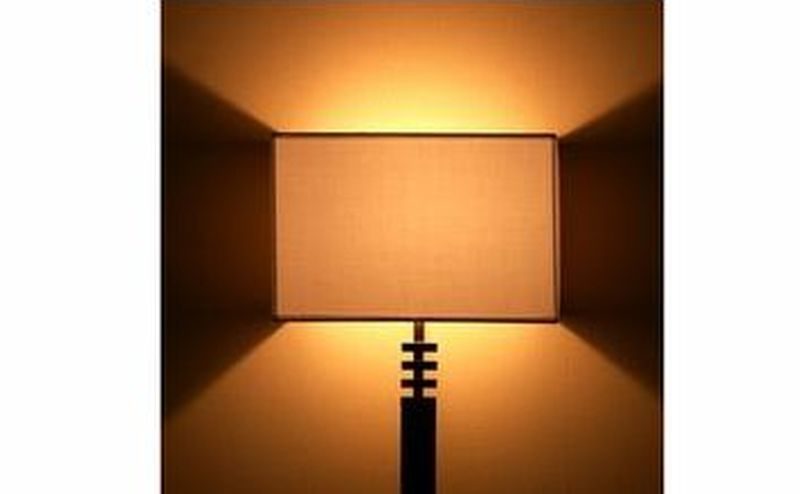
One of the great ways to add some style to your home decorations is by beautiful lampshades. And one of the popular choices in this area is the acrylic lampshades. And wait there is more. You can easily make these acrylic lampshades on your own. Acrylic lamp shades can be easily made from acrylic sheets that come in a range of colors and textures. So, you can push on your creative button and get designs that you have always wanted. You can have these lamp shades in any size you want.
So, you can make multiple lampshades according to the requirement of your home. Though these lamp shades may appear fragile and delicate, but unlike glass lampshades that can easily break, these lamp shades are unbreakable. The individual acrylic panels become quite strong once they are mixed with acrylic cement. Hence, you can relax that these lamp shades are going to last for a long time.
Difficulty: Moderately Challenging
Time Required: Varies from person to person
Resources Required
- 1. Acrylic sheets of around 3/16 inch thick
- 2. Tube of clear silicone caulking
- 3. Acrylic cement
- 4. Needle-nosed applicator or medical syringe
- 5. Marker pen
- 6. T-square (metal ruler)
- 7. Utility knife
- 8. Masking tape of around 1-inch thick
- 9. Fine wet/dry sandpaper
- 10. Lamp shade ring (washer-top or clip-on)
- 11. Wood blocks or heavy books
Instructions for acrylic lampshades
1. To start off your lampshade project you need to measure four acrylic panels. Once you have done that you need to measure the diameter of the lampshade ring to understand the top width of two narrow panels.
So, now you have the dimension you require with you, now multiply the thickness of the acrylic sheet by two and then add to the last dimension. Finally take the dimensions of the panel length along with the bottom width of the acrylic panels. You have now completed the first step successfully.
2. Moving to the next step, you now need to mark and cut these four acrylic sheets to give a shape to your lampshade. You will also need to give mark up lines on the sheet for clarity. Take note that each line should run through the entire length of the panel, otherwise the dimensions will not come out correctly.
The best way to do this is by placing the sheets on a flat surface. This will help in avoiding in uneven cuts, edges and markings. Cut through the marked line slowly with the help of a sharp utility knife along with a metal ruler. Keep a close eye to rule out any kind of accidents that can happen because of using the sharp utilities.
Make sure the cut is around ¾ of the way into the sheet. Once you have dug deep enough, put downward pressure on the sheet so that the required area snap offs in one piece. Once more, you need to be careful at this point as excessive pressure can make the sheet to break into two pieces. Repeat this process, till you have got all your required pieces together.
3. Moving to the third step, you now need to put together the acrylic panels to make the lampshade body. Pour the acrylic cement in the syringe or applicator till it is around ¾ full. Now apply to join the ends. Too much or too little of the cement can make your project fall apart. Once you have applied the cement, put tape to seal it up.
Do a final check of angle with a T-square. If you require any modification, you need to do it at this point before the cement seals the ends. In the beginning when the cement is still soft, it would require support. Give the required support with wooden blocks or heavy books. Place them properly, so that they don’t stumble and fall on your project.
Once the initial cementing is done, add some additional cement to fix the joints. Once this is done keep aside to dry for around 10 minutes. You now need to repeat the entire process for the remaining two panels. Once all the sides have been put together and the cement applied wherever required, keep it supported for up to 48 hours to set.
4. After the 48 hours are over, check if the joints are sealed. Now attach the lampshade ring to the standing shade you made a day earlier. Now starts the final procedure. Slowly remove the masking from the inside acrylic panels. Once done, put the tape wire back to its original settings.
You need to make the ring firm by putting a layer of clear silicone bonding agent caulk in between the lampshade and the ring. Keep it aside to let it dry for some time. Once dried, take off the last layer of peel off tape and whatever is remaining of the protective masking from the lamp shade.
Quick Tips when making acrylic lampshades
1. Make sure you keep the protective paper on the acrylic sheet till you complete the entire lampshade project. Acrylic sheets scratch very easily, so the protection will come handy.
2. Avoid rounding the edges of the acrylic panels as they don’t bond well.
3. It is possible that you may require some amount of practice before you get it right. You need to be careful while measuring, cutting and assembling panels from the scrap cardboard and then finally check for any kind of inconsistencies. You also need to be careful on how much pressure you apply so that the sheet doesn’t break.
Things to watch out for while making acrylic lampshades
1. Before you start off, make sure your work area is well ventilated as you will be working with acrylic cement.
2. Also keep all flammable things at a distance as acrylic is highly flammable.
3. You should also wear protective eye gear and gloves.
So, what are you waiting for? Collect all the materials and make your very own acrylic lampshade.