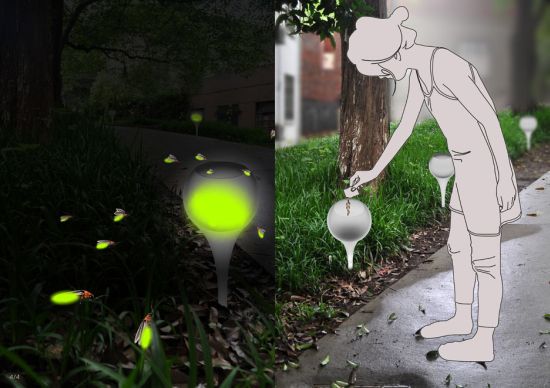

If you are grilling BBQ’s on a family picnic in your garden or are out at the camp with a scout troop, then you might have faced troubles washing your hand, before, during and after meal preparation because you may have to go to the bathroom in your house and wash hands a number of times. But not anymore, this time you can watch your guests and have fun, as with little ingenuity and hard work you can make a foot pump inside your own garden. This would also ensure safe food handling process as you won’t have to turn on and off the faucet with dirty hands, plus a foot pump would be cool.
But mostly importantly, it is convenient and a good way to conserve water. While at a camp you may use gallons of water while washing your hands, this pump would ensure that you save water. Since, it is operated by foot, therefore you would think twice before wasting water as you would have to do physical activity before you get a bucket of water. It will keep water usage to minimum. Read the steps to create one for your own self.
Difficulty level: Moderately challenging
Time taken: Varies from person to person
Resources Required:
Two 5 gallon bucket with lid,
Outboard motor or marine,
Fuel primer squeeze bulb and hose assy.
3/8’’ brass fittings and tubing,
Rubber o-ring,
Door hinge,
Scrap wood,
Various 1’’ and ½’’ plumbing pipe sections and fitting and utility buckets
For all those who don’t know, the squeeze bulb is basically a pump which transfers the water from fresh water bucket to the spout and out. Thereby it is collected and funneled by the basin in another bucket.
Estimate cost: There isn’t much cost involved in this project. You can easily get most of the things from home or buy them at cheap rate from a hardware store.
Instructions:
The first step requires you to frill a hole in the fresh water bucket. The hole should be about 1’’ from the bottom and must have a 3/8’’ diameter. Now, pass the 3/8’’ 90 degree brass fitting through the inside of the bucket.
Thread on a female 3/8’’barbed hose fitting from outside the bucket. Another male barbed hose fitting must be threaded at a 90 degree angle inside the bucket. Now, angle the open end of the barbed fitting in a downward position. Keep this downward until it touches the bottom of the bucket.
These fittings will allow you to pull water from the bottom the bucket and make it almost empty before it needs refilling.
Alternately, you can also drill the hole in the lids if you don’t want to ruin the buckets. But make sure that you keep both the buckets stacked together as it is difficult to transfer water from top.
Add a basin or the lid for your grey water bucket, where all the filtered water would collect. This basin is nice and provides finishing touches to the project. At the same time it keeps the water clean and doesn’t let the dirt enter. It also keep the dirty, used water from splashing back. Most of all the basin would not reduce the storage capacity of gray water bucket as it fits on the top.
But before you put a basin on the top, you need to construct it. This is done from the upper portion of a third bucket and a bucket lid. Firstly, you should remove the rubber seal from the bucket lid making sure that the underside is not outlined by the seal. Now, cut along the area where there was a seal before and remove the outer rim. Trim any excess material to clean the outer diameter and make it smooth.
You can make your basin concave by heating the lid in the oven at about 275 degrees for 15 minutes and softening the plastic. Then you could work it over the bottom of a large glass mixing bowl to give a concave shape. But this step is not necessary; in fact it is the most difficult step. You can skip it if you want. A concave look would only enhance the basin feel.
After this is done, the basin would look like a shorter bucket with a center drain hole over the gray water bucket. You can also make a shortened bucket basin with rest of the trimmed lid. For this you will have to drill 4 1/8 inch diameter holes through the trimmed lid and basin side walls. Drilled holes should be one on North, South, East and West side each. Now, secure the two components by using aluminum pop-rivets passing through the drilled holes.
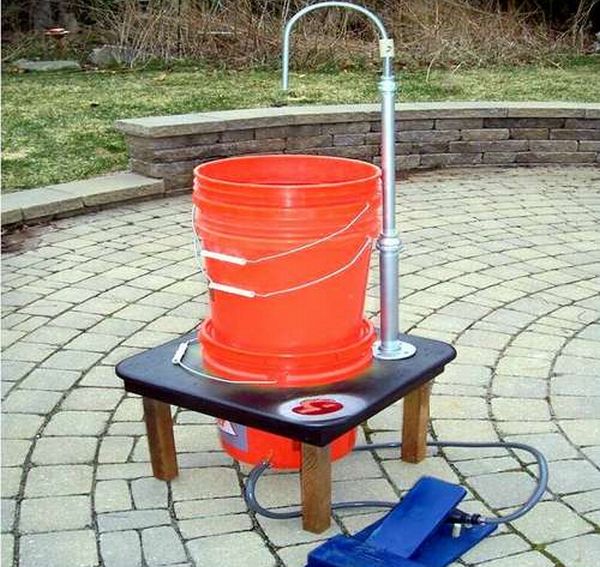
Once your water collection surface is prepared, you need to make a foot pump. This pump is supports an outboard motor or the marine fuel line along with primer squeeze bulb. To make the pedal, use waste wood, foam rubber toy ball and also wood dowels. The dowels are necessary as they allow the bulb to move when you foot pump. The foam rubber ball would protect the squeeze bulb. Make a support table to provide stability to the 2 buckets particularly if the ground is uneven. The table would also hold the gray water bucket a few inches from the ground and keep it safe.
Support table is also required to attach the spout riser. This is basically galvanized pipe sections measuring 1’’ and ½’’ diameter that are attached to the support table. Now you need to bend it into a 180 degree cane shape, its diameter bending around the ½ diameter of the bucket. The spout nozzle would therefore position over the hole in the basin. Now make a 2’’ section of clear hardware tubing on the other end of the spout and slide a ½’’ to 3/8’’ galvanized reducer fitting onto the spout. After the spout and tubing are interwoven through the spout riser piper, you need to connect clear tubing attached to the squeeze bulb pump. This could be easily disassembled for storage.
The handy wash station is now assembled, but before you start using it, make sure that you clean it up. For this full the lower fresh water bucket with water and place a lid on it. Now put the other bucket on the top of this bucket and cover it with the lid. Begin to pump water and see the magic.
Frequently asked questions:
Q. Is this process difficult?
A. The process of completing this project is surely a little challenging, but hard work and firm determination can help you succeed.
Q. How does this project saves water?
A. To run this basin, you need to pump water through foot that requires effort. Since, the water is not free flowing and there is effort involve, therefore, you use it adequately and minimize the consumption.
Q. Why do we need two buckets?
A. The first bucket or the fresh water bucket would simple collect water. This water would then be filtered by the pipes connecting the bottom and upper buckets and you would get clean water in the top or gray water bucket.
Quick Tips:
Make sure that you use two buckets for water collection. Add a basin on the top bucket to keep water clean and to avoid water spillage. Disassemble the basin when not in use. Don’t use the water for drinking or cooking purposes.
Things to watch out for:
Make holes with precision; you don’t want any extra water to spill. Use a basin for protecting the top bucket. Most importantly don’t use this water for cooking or drinking purposes as the primer bulb specifically indicates that it isn’t food grade safe.
Go out and conserve water with your little steps.