


The project
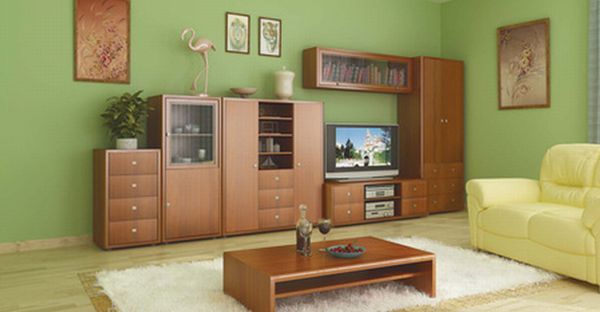
Wall units are the interesting aspect of lighting up the dull and boring living room. You can integrate technology in a space starved living area by using a stylish wall unit. Wall units, if arranged and assembled in a proper way, makes the room sleek, stylish and larger than what it is. They can be used to organize and store number of items such as entertainment equipments, books, decorative glassware and other precious items. They can add a distinct glamor into your living room without much investment. Wall units solve your purpose of attraction with utility. The strength of the wall units is the utmost important as lots of things are placed on it. Built-in units should be attached to the wall framing to secure the wall units.
Difficulty Level: Moderately Challenging
Resources required:
• Home design books
• Circular saw
• Razor
• Sander
• Wood glue
• screws
• Variable-Speed Drill
• screwdriver
• Remodeling magazines
• Measuring tools
• Sketch pad
• Graph paper
• Wood as per choice
• Veneer tape
Instructions:
1. Choose the pattern of your choice from various options on net and books. You can customize it according to your choice.
2. Wood is another thing to be taken into consideration. Choose the best quality wood for to your design and space.
3. Take appropriate measurements if wall space for the wall unit.
4. In order to locate wall framing, use a stud finder for better designing of units.
5. Sketching is another basic step to see if the unit fits into the room. Sketching should be done with important measurement like length, width and height.
6. Make floor plan and sketch all the items of unit’s storage.

7. Think for proper placement of different items according to their weight and utility and accordingly decide the width and height each shelve in wall unit.
8. Properly place the doors in your design. Use cabinet doors at certain sections and use baskets of identical size, shape and color in open shelves to hide the clutter.
9. Cut the boards of plywood by taking measurements very carefully. Use worktable or setup sawhorses so that cut are proper.
10. Mark all the cuts one by one. Use straight edge for circular saw.

11. After cutting, sanding of wood is required then veneer’s tape is applied on the exposed edges of wood to give it a neat and polished appearance.
12. After drying, trim the edges with razor without cutting any wood.
13. For final sanding in the end use sanding disk of 150-grit to sand all the pieces without pressing too hard. Give final sand with200-grit.
14. The pieces are ready to assemble now. For stability the pieces of side towers of unit are first glued with wood glue. Use stain able wood glue so that it becomes invisible in final stage.

15. Pre drill holes and insert screws in it for the attachment of boards. When boards are attached according to your design then fix it on the wall.
16. Also make pilot holes on wall and fix the structure on the wall by inserting the screws.
17. Use the stain of your choice to get the desired results. Lighting can be an additional feature that can be added to enhance the beauty of your unit and also serve some practical functioning like finding something inside shelf.

Quick Tips:
• Glue should not be used in excess to avoid spill over.
• To give high quality look to your wall unit, add crown mould to top and bottom perimeters.
• For the space at topmost area use recessed lighting.
• Add high end wood trim in face of the shelving.
• The part that is attached to the wall doesn’t require edging.
Things to watch out for:
• Proper ventilation is must for applying stain or paint.
• Tools should not be within the reach of children.
• Always use mask and eye wear when using saw.
Via: BeJane

