Fine wine happens to be exceedingly delicate that needs particular conditions for storage. Though there is an immense cross-section of wine racks found in various materials, wooden wine racks have their old charm and come first in versatility. Wooden wine racks can be found in varying sizes having the capacity of storing from four wine bottles to 120. In addition, cost effectiveness happens to be one of the biggest plus points of these wine racks. Aesthetically, they throw in a tinge of beauty and panache to your interiors.
12 Bottle cube-stack wine rack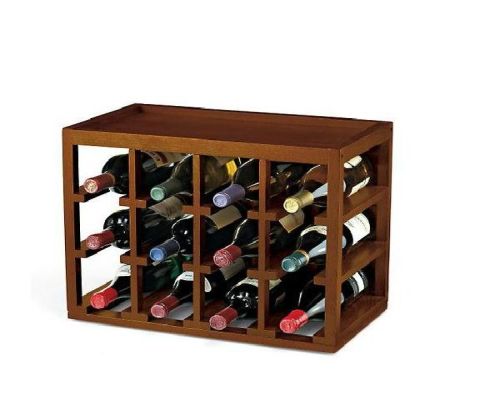
Price: $64.95
It is a fantastic wooden wine rack that holds the capacity to store 12 standard Bordeaux 750 ml wine bottles. It is a stackable hardwood rack, which has been designed to fit securely on the top of the other for space-saving storage. Furthermore, this rack is quite durable and strong.
What’s unique: This beautiful and durable wine rack is crafted from mahogany wood that has been given a natural finish.
Riddling racks by Vintage at Heart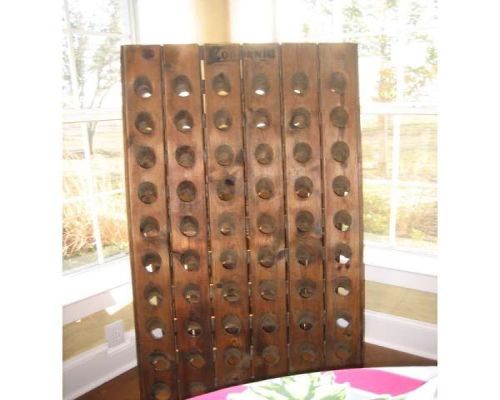
Price: $175-$699
Every wine enthusiast would surely love this extraordinary and unusual wine rack by Vintage at Heart. This beautiful rack is handcrafted from repurposed oak that turns out be its one of the most significant traits. Moreover, this rack has the texture, age, small cracks, knots and splits-all made in wood that offer it a striking charm. This rack is available in various sizes, single and double sided.
What’s unique: Riddling rack is made from repurposed oak and is absolutely handcrafted.
Jumbo bin 120 bottle wine rack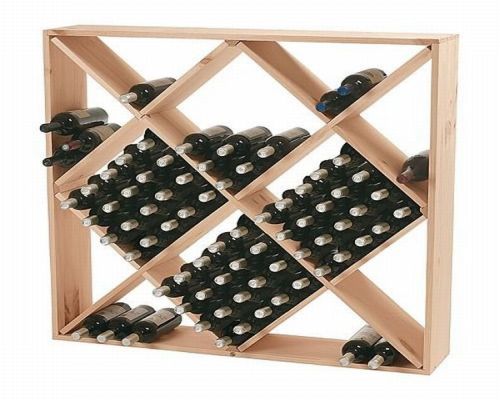
Price: $149.95
Absolutely eco friendly, pretty and durable, Jumbo bin 120 bottle wine rack is hand-cut and hand-sanded to offer it a remarkably even color and grain. It comes in a square shape that features diamond and triangular compartments that can easily stack up your wines smoothly.
What’s unique: This wine rack is 100% eco friendly and very durable. It comes in two shades-natural and mahogany.
Ziggy wine rack
Price: $79.95
Add a bling of unexpectedness and asymmetry to your house with this amazingly beautiful ziggy wine rack. Inspired by the modern art, this wine rack is different enough to add spice without knocking your guests flat. It features playful angles that maximize the space and makes it quite creative for you to display your wine bottles.
What’s unique: It can club up to 20 bottles and is made from wood composite that has been given a glossy white finish.
Oenophilia Bali 12-bottle wine rack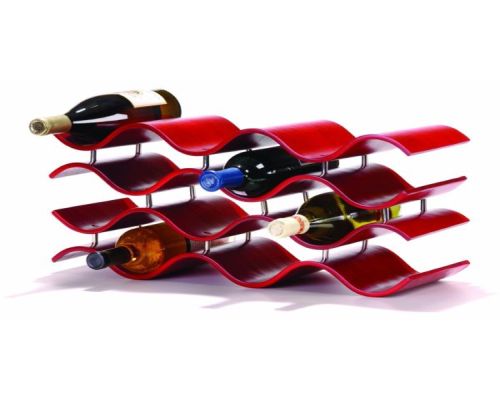
Price: $58.49
With striking wood construction, Oenophilia Bali wine rack takes a cue from contemporary Indonesian design. This lovely wine rack comes in many interesting hues that make it interesting for you to club your wine bottles and also boost you home décor.
What’s unique: It features stylish wooden accented by stainless steel, which creates sections to store 12 wine bottles.
Winsome Wood Kingston slot wine rack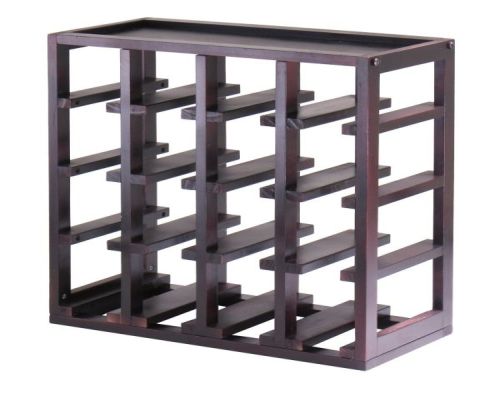
Price: $49.99
Winsome Wood’s Kingston slot wine rack features mix-and-match stackable cubes that effortlessly show your vintage wine bottles. It is crafted from solid and composite wood that has been given a charming deep espresso finish. Its trim slats stack up to 16 bottles.
What’s unique: This beautiful wine rack from Winsome Wood features removable rack cubes.
Mango Wood wine rack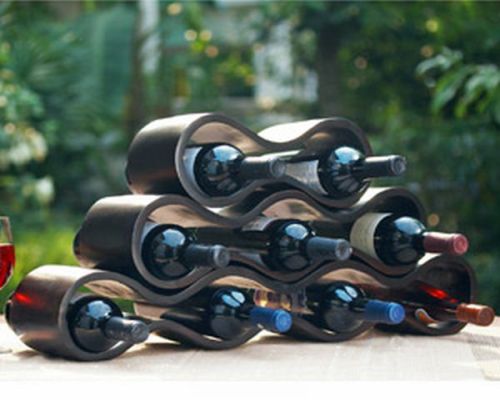
Price: Not available
Mango wood wine rack is absolutely a work of modern art even when it isn’t stacking any wine bottles. It is a 100 percent handcrafted wine rack made by skilled artisans. It is made from eco friendly tropical mango wood that makes this piece quite interesting.
What’s unique: This wine rack is made from three separate pieces that can be separated and re-joined to form new and creative fluid designs.
18 Bottles stackable wine rack kit
Price: $ 44.95
Crafted from the finest sustainable trees in Indonesia, 18 bottles stackable wine rack kit is highly durable, beautiful and absolutely eco friendly. It is hand cut and hand sanded, which adds striking character, color and grain to this lovely wooden wine rack.
What’s unique: It comes with support braces to add in extra strength and durability.
Designer wine rack kit – 4 Column curved corner wine rack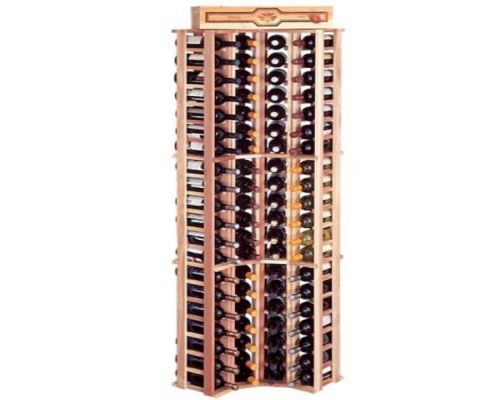
Price: $279
This wine rack is a luxurious wood wine rack that features four columns that can house up to 80 bottles of your vintage wine. It has been completely handcrafted and offered a fine custom racking look. From head to toe, this wine rack is exquisitely designed to make it go with any kind of décor.
What’s unique: With high durability and good looks, this wine rack can store 80 bottles of wine.
Kamenstein 5021404 Butterfly 8 Bottle wood wine rack
Price: $17.99
Butterfly wooden wine rack from the Kamenstein is a beautiful and extraordinary wine rack that can store eight bottles of your precious wine. It measures 15 x 7.5 x 12 inches with 5.6 pounds weight. Moreover, it is quite strong and features a tempting walnut finish.
What’s unique: Unusual and striking shape and finish of this lovely wine rack takes away all the cookie points.